This guide covers setting up a connection between SaleSqueze and Google Analytics using Google Tag Manager. It assumes that you already have a Google Analytics account. If you don’t have one, please refer to Google documentation or use a tutorial like this one from Moz or this one from HubSpot.
Only GA4 properties are supported.
Google Analytics Configuration
Setting up a Data Stream
You are likely already using Google Analytics to collect and analyze data from your website. To add data from SaleSqueze, you’ll need to set up a new data stream for it.
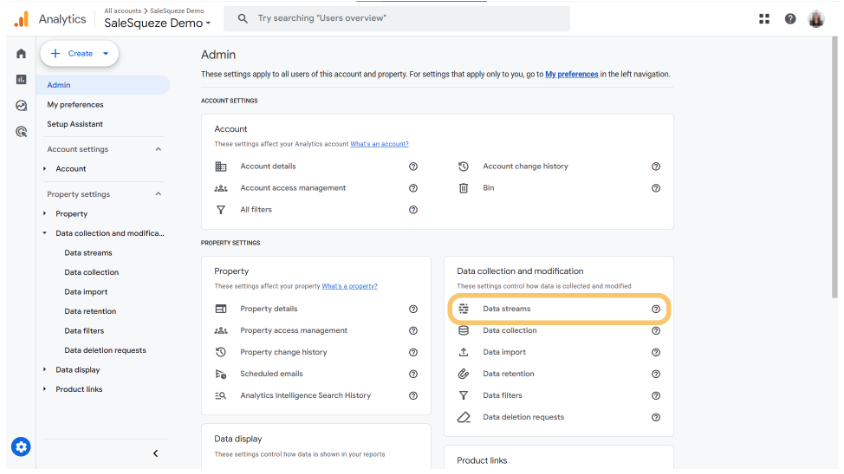
In the Admin screen, click Data Streams in the Data collection and modification section.
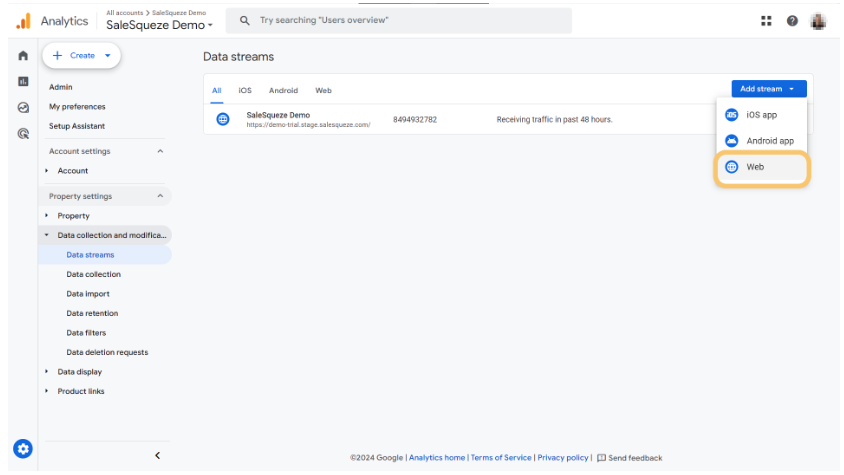
Click on the Add stream button and choose Web from the button’s drop-down menu.
If you get a pop-up notice, click Yes to continue.
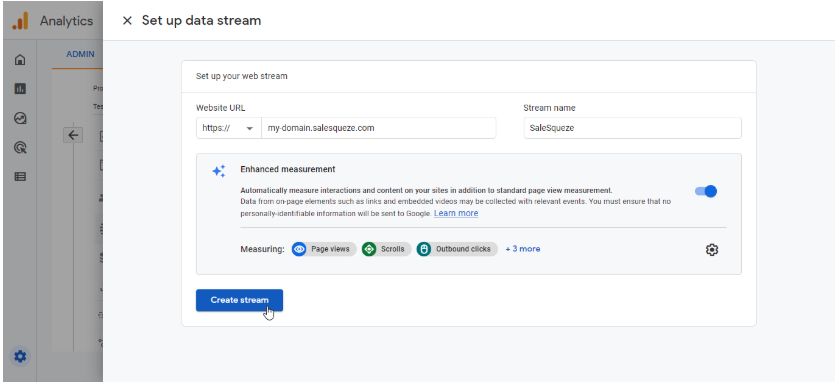
Enter your SaleSqueze domain name and click Create Stream. Make sure Enhanced measurement is enabled with all the default settings enabled.
Note: Google Analytics will now offer you a Google Tag snippet, which we don’t need. You can dismiss the dialog by clicking on the ✖️ .
You’ll now see the Web stream details. Since we haven’t connected everything yet, you will see a notice that data connection isn’t active for your website. Copy the Google Analytics Measurement ID by clicking on the Copy icon.

Google Tag Manager Configuration
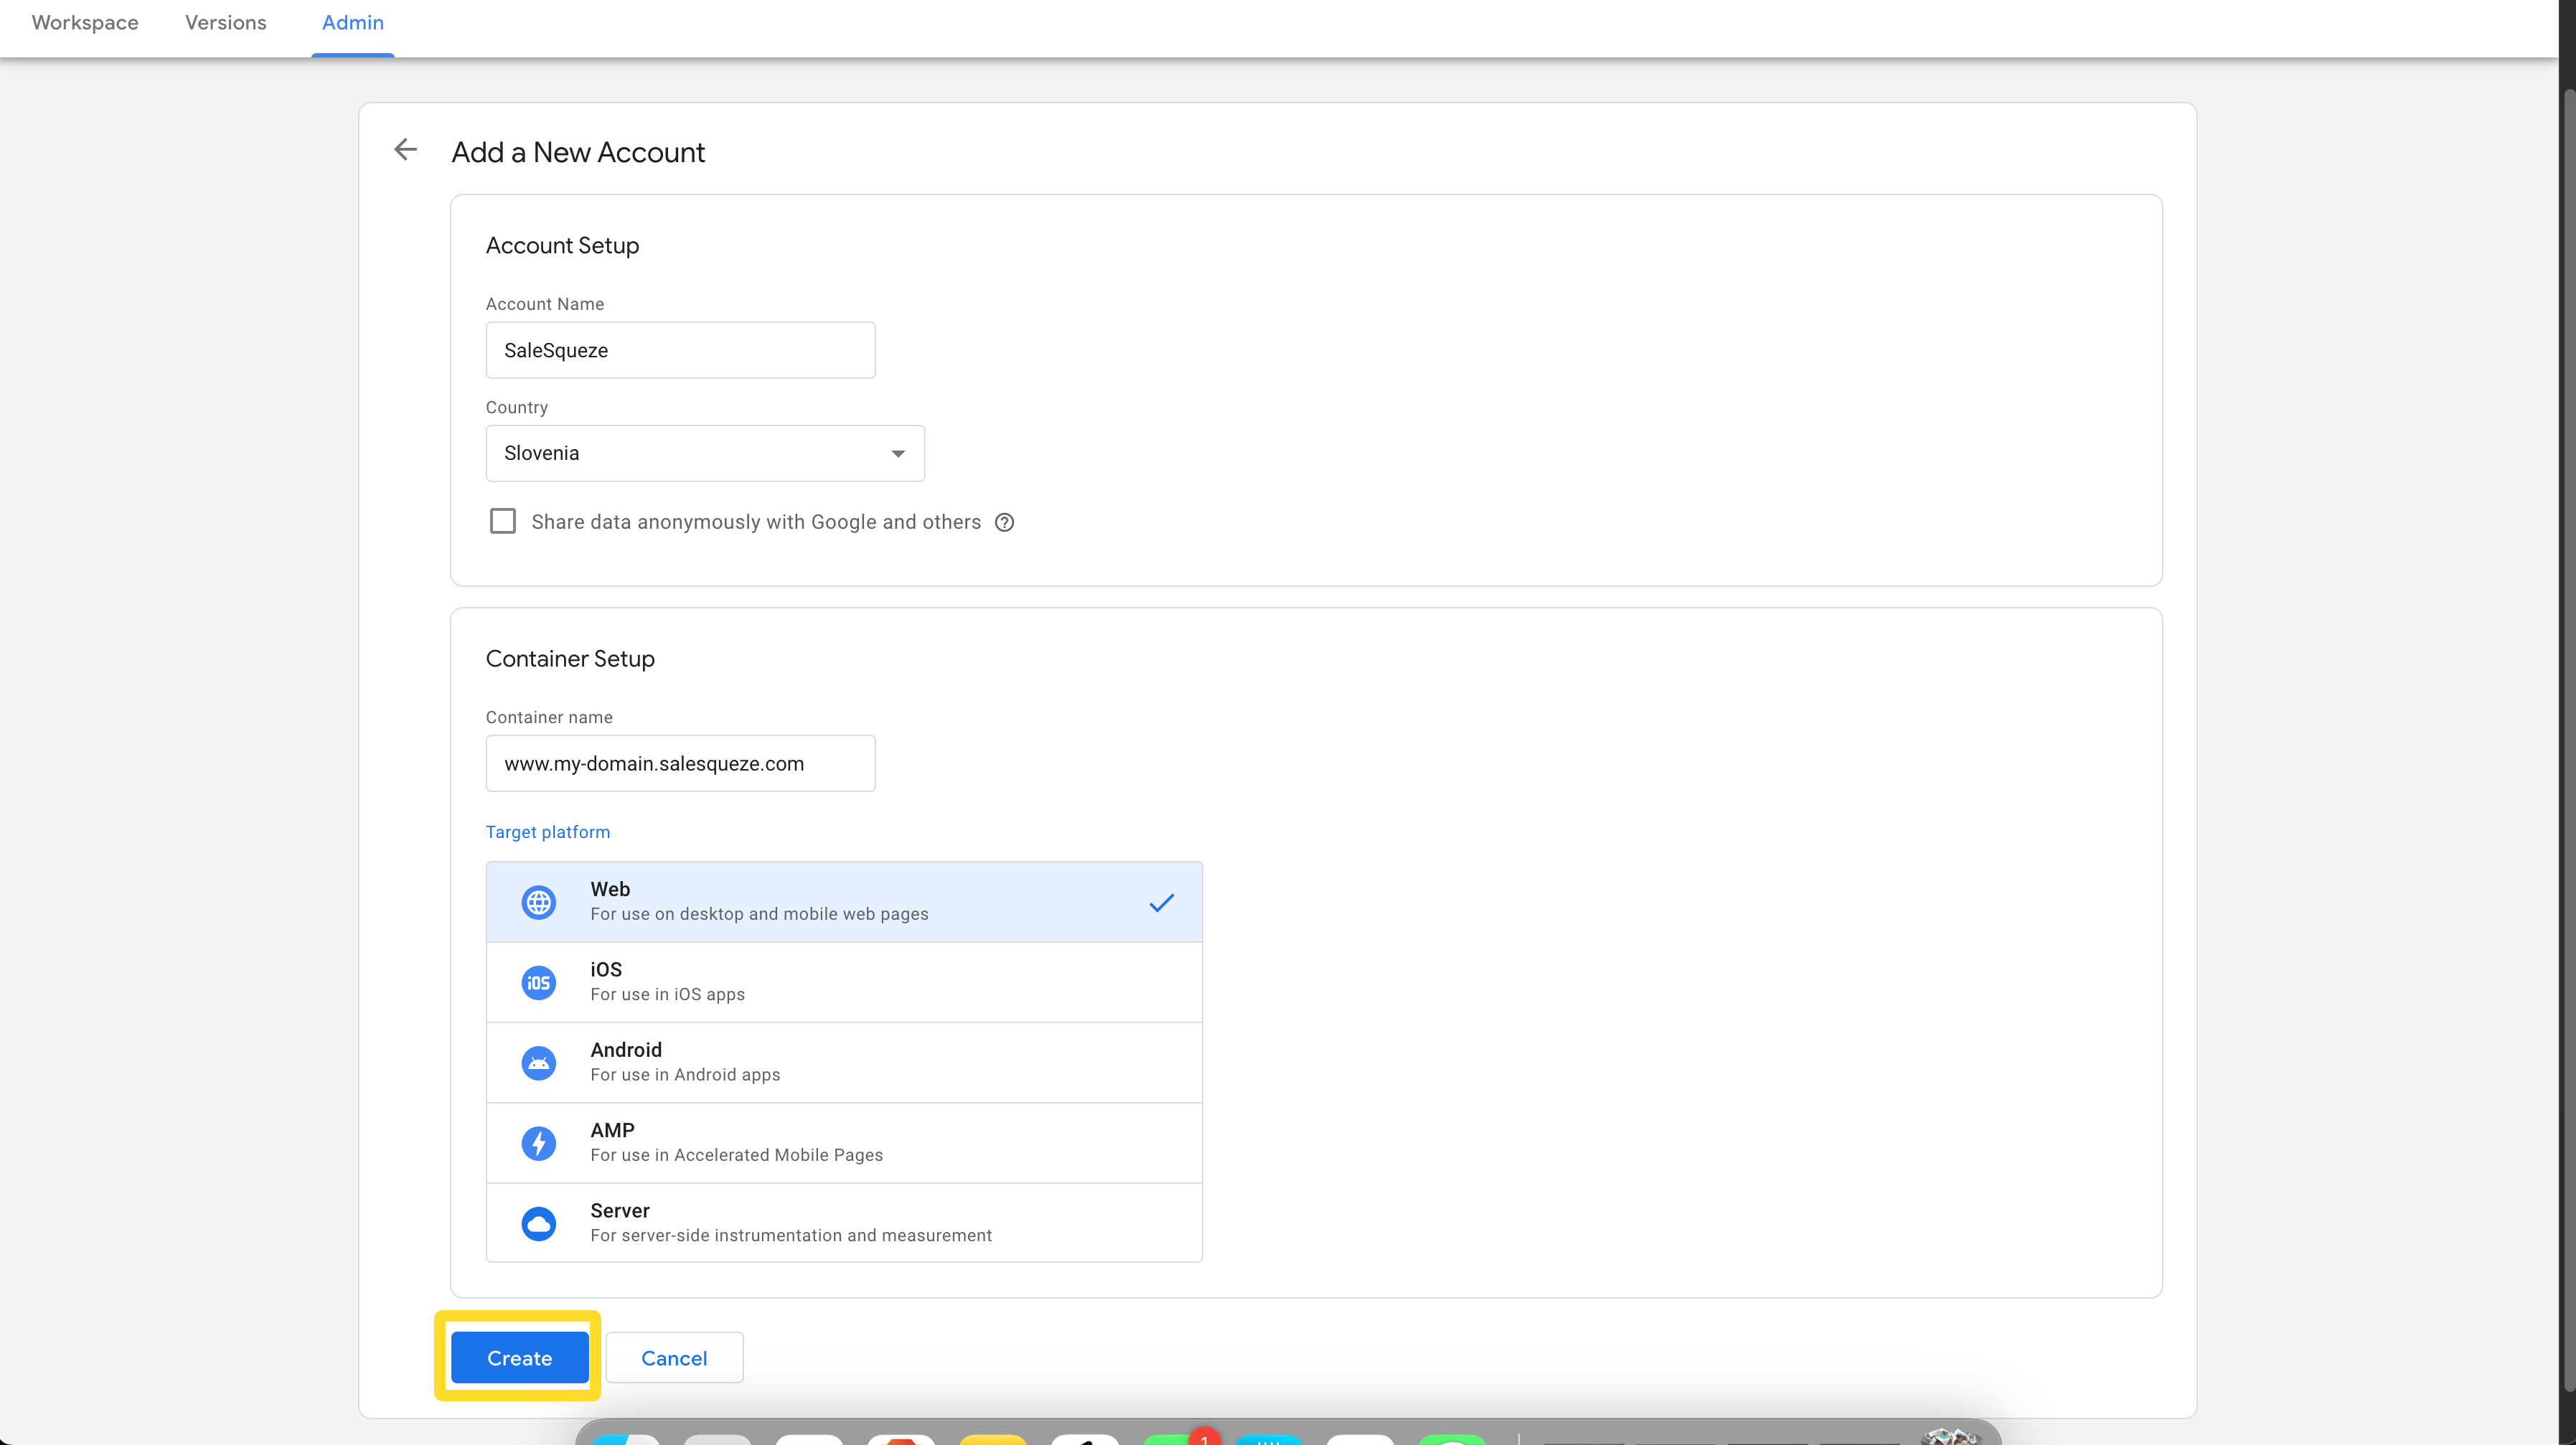
Next, open up Google Tag Manager to set up a tag for Google Analytics there and create new Account.
Create container
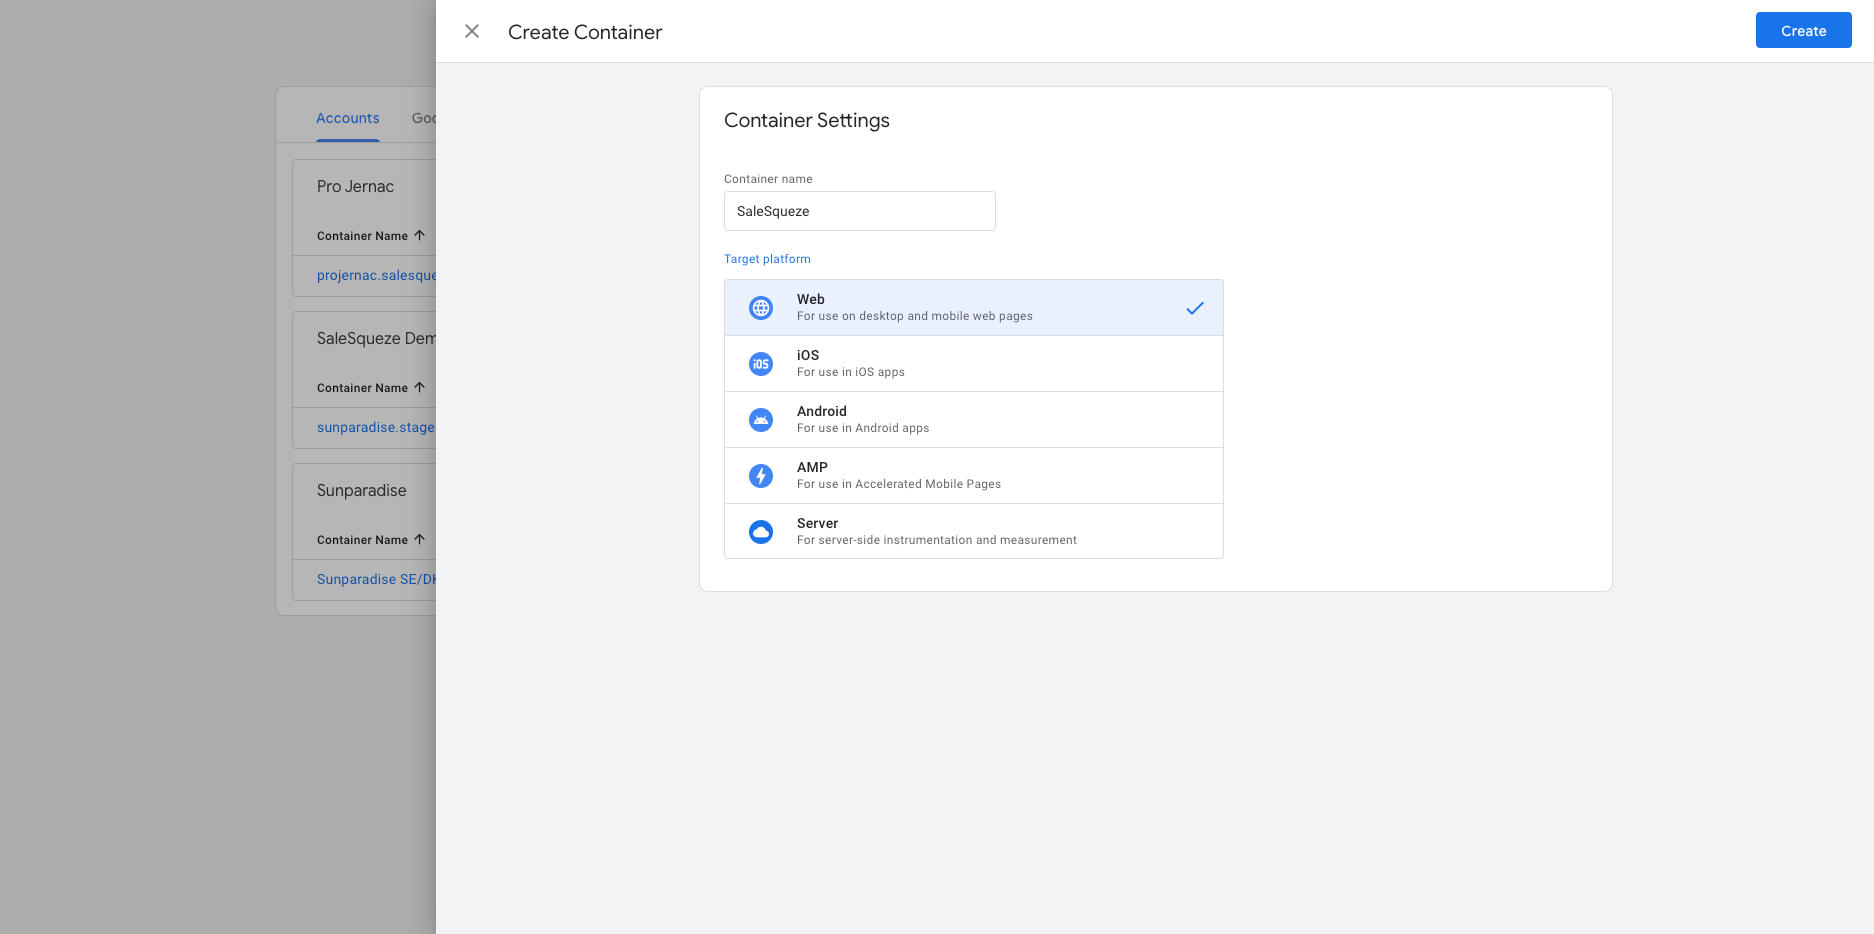
Importing container
Download container file from this URL and import it into Google Tag Manager under Admin – Import Container

Navigate to Variables section and change “gaid“ value to the Measurement ID that you have copied from Google Analytics.

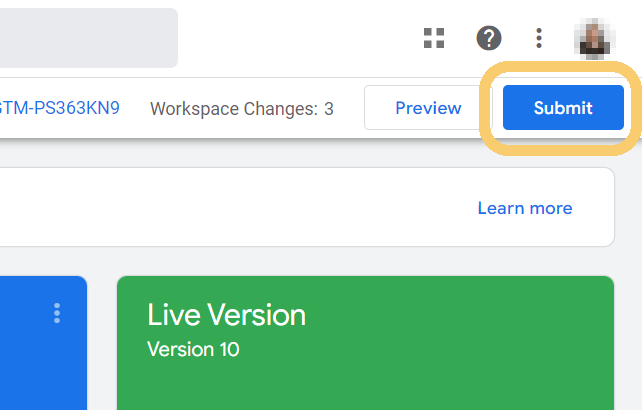
Be sure to publish your changes by clicking Submit in the navigation bar!
Connecting Google Tag Manager to SaleSqueze
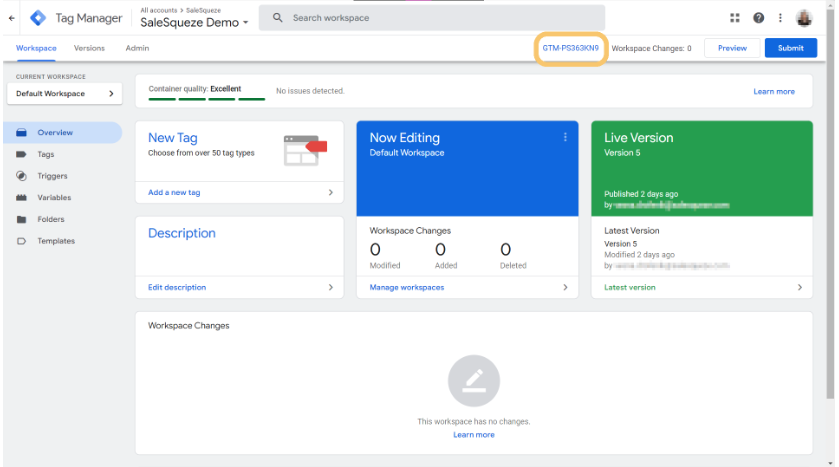
Let’s set up the connection in SaleSqueze. Find the GTM measurement ID, a code with the format ‘GTM-XXXXXX’, and copy it to your clipboard. You can find it in the Admin section of Tag Manager, but it’s easier to just select and copy it from the navigation bar in the Workspace view.
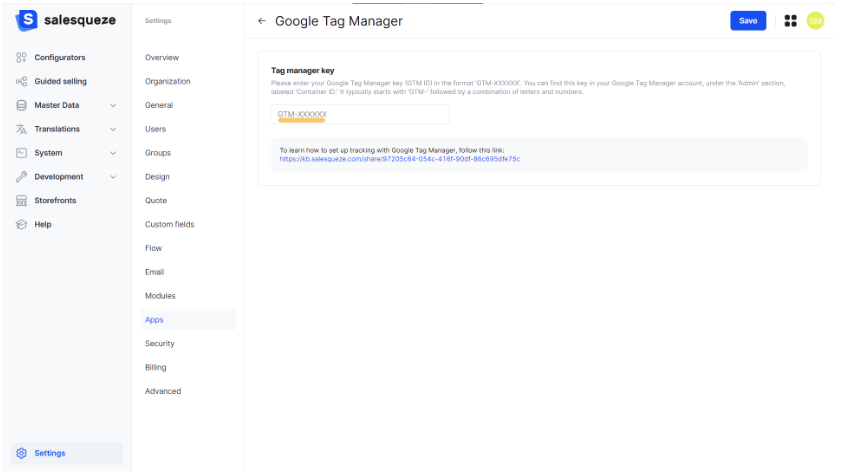
In SaleSqueze Studio, go to Settings > Apps > Google Tag Manager, and click on Activate. Once the app has been activated, click on Settings to open the app settings.

Paste the GTM measurement ID into the Tag manager key field, then click on the Save button.
At this point, all page views and default data such as engagement time, scrolling, etc. will be automatically tracked in Google Analytics. It may take a day or two to start measuring event so see you tomorrow or a day after it 😄.
Testing your integration
To make sure that everything has been set up correctly, it’s a good idea to use the Google Tag Assistant to check the connection works. Before testing, turn off any adblocking extensions or browser features you may be using.
Testing the connection for debugging
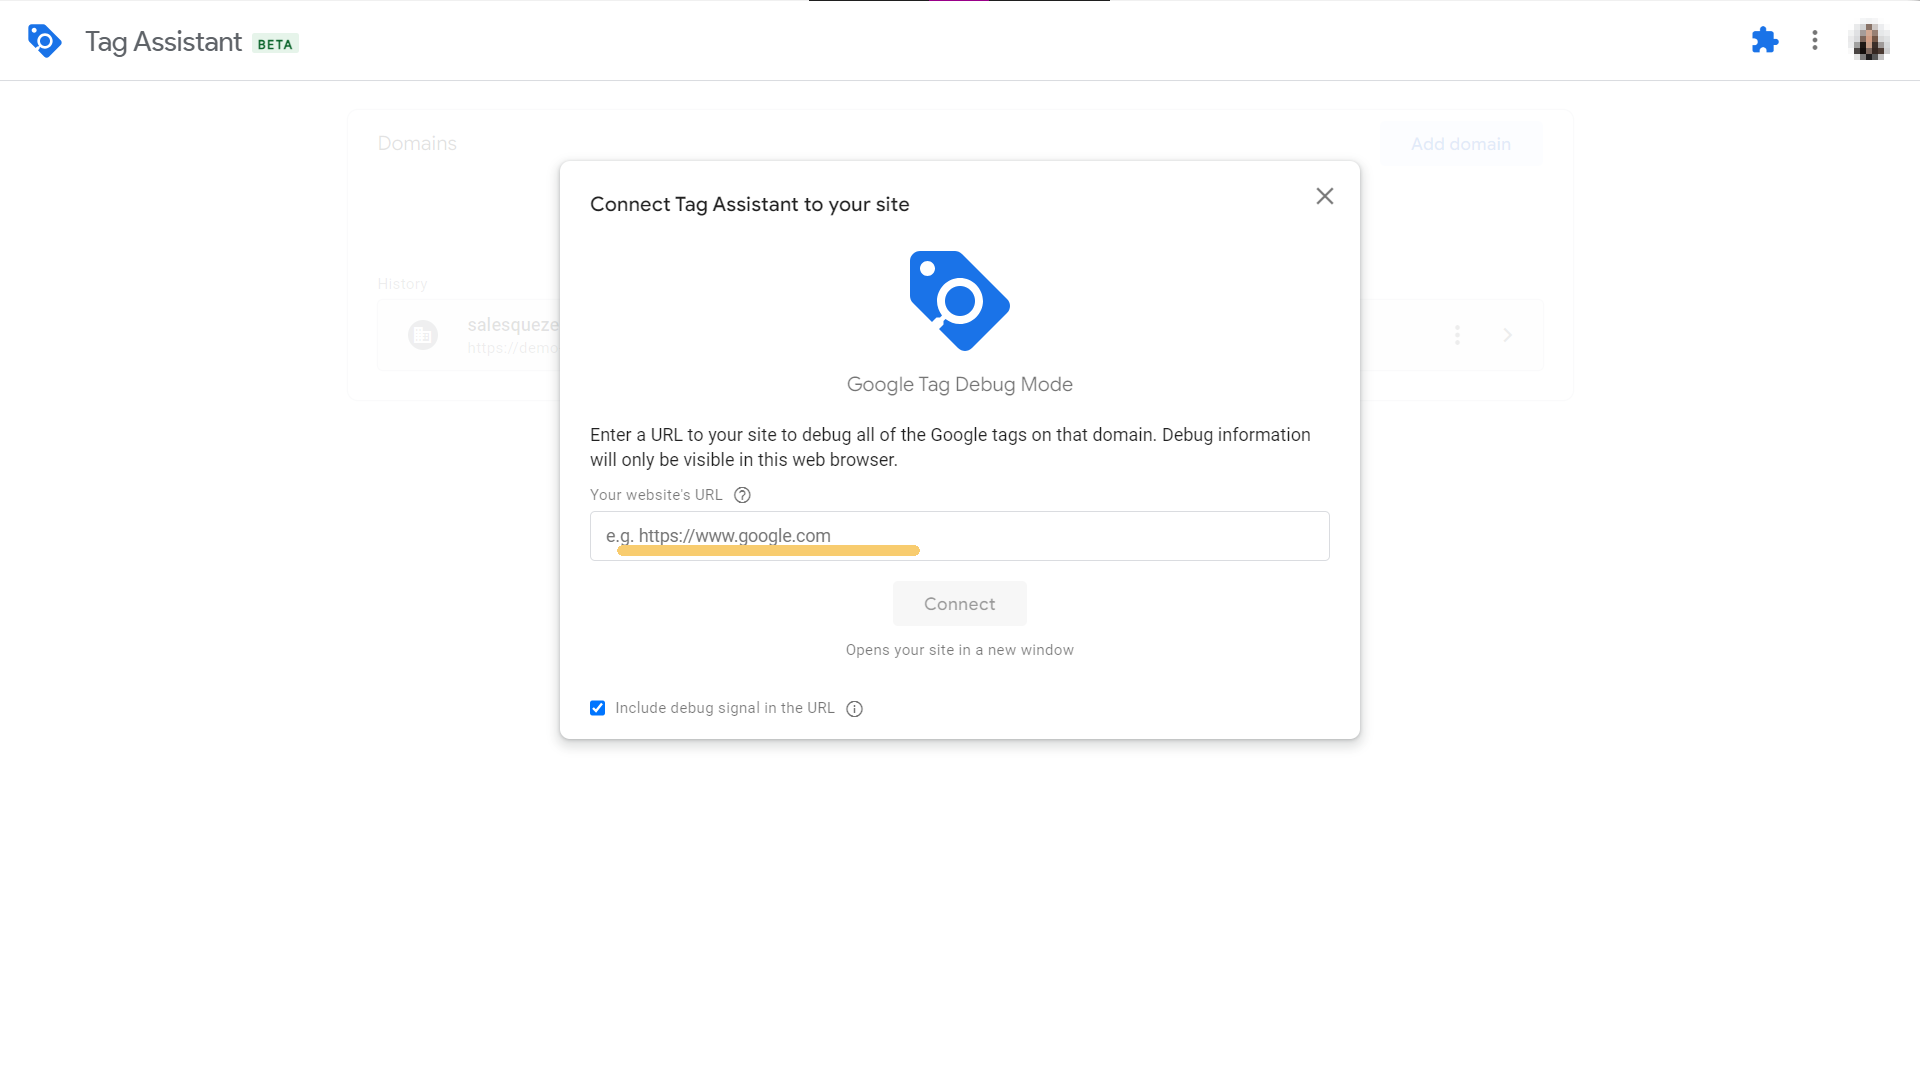
Open the Tag Assistant in a new tab. Click on Add domain to add your SaleSqueze domain URL to the debugger. Type in your Showroom URL (this is usually https://my-domain.salesqueze.com/en/showroom/), then click on Connect.
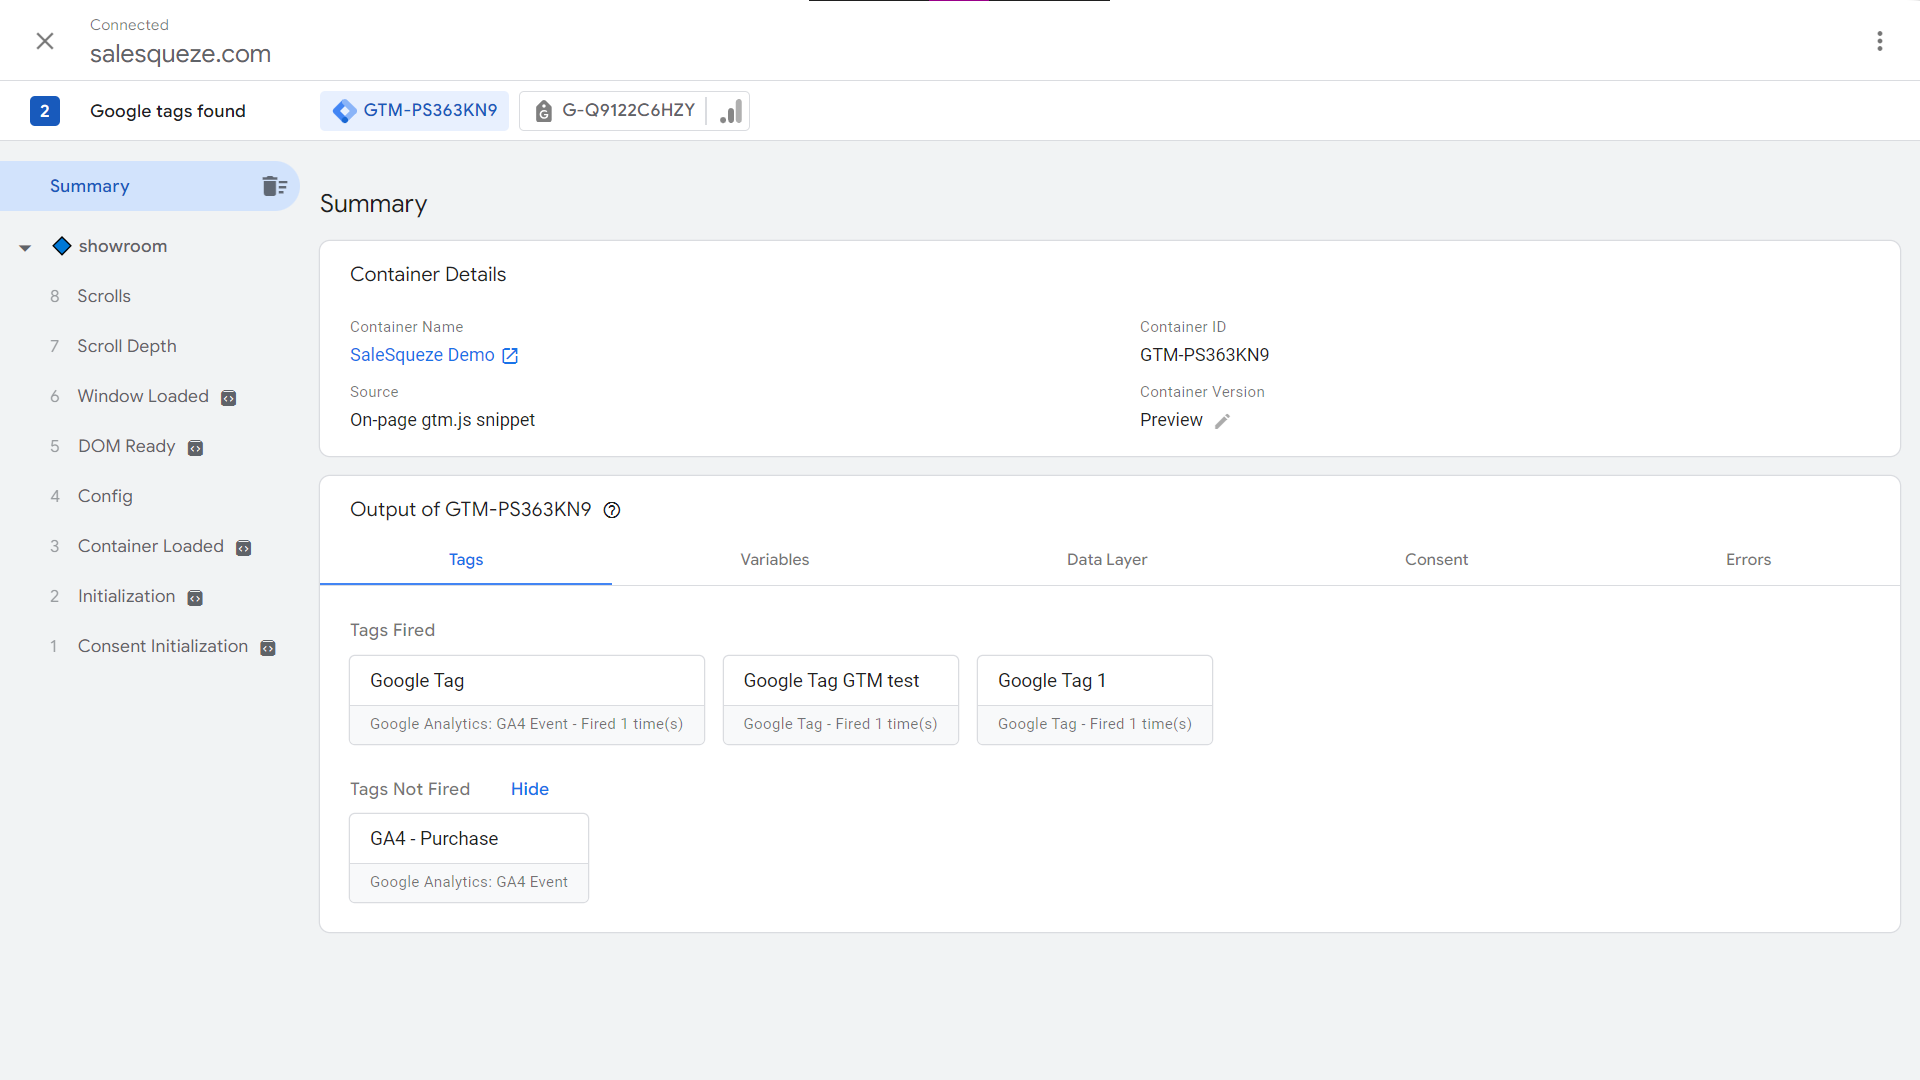
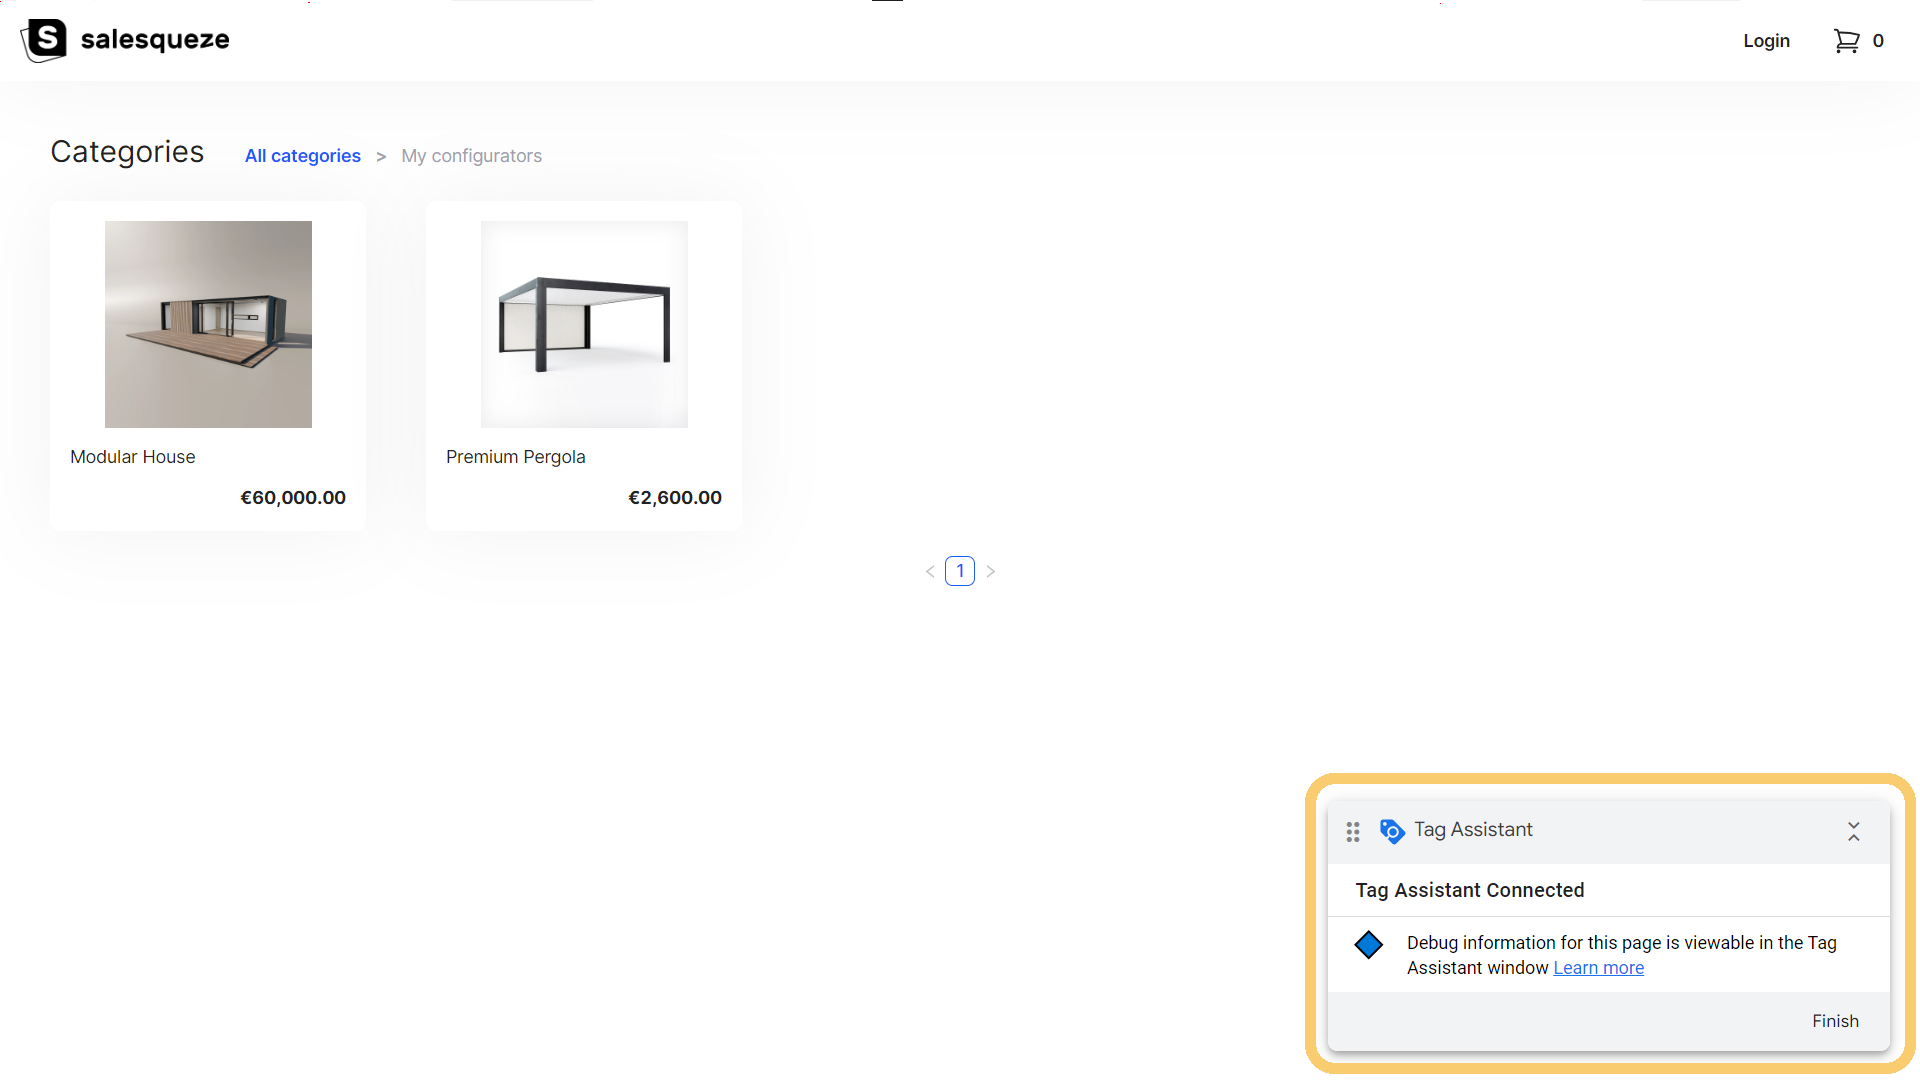
The Tag Assistant will now open your Showroom URL in a new tab. Keep this tab open until you’re finished testing the connection. Wait a few seconds for it to establish a connection.
A successful connection will be indicated in both tabs. You’ll be able to know that the connection is active because the tabs’ favicons will be blue and blinking.
Testing the event trigger
We’ll use Google Analytics’ DebugView to test whether the events are being triggered correctly. Keep the Tag Assistant connection open – it lets Google Analytics retrieve debugging data in real time.
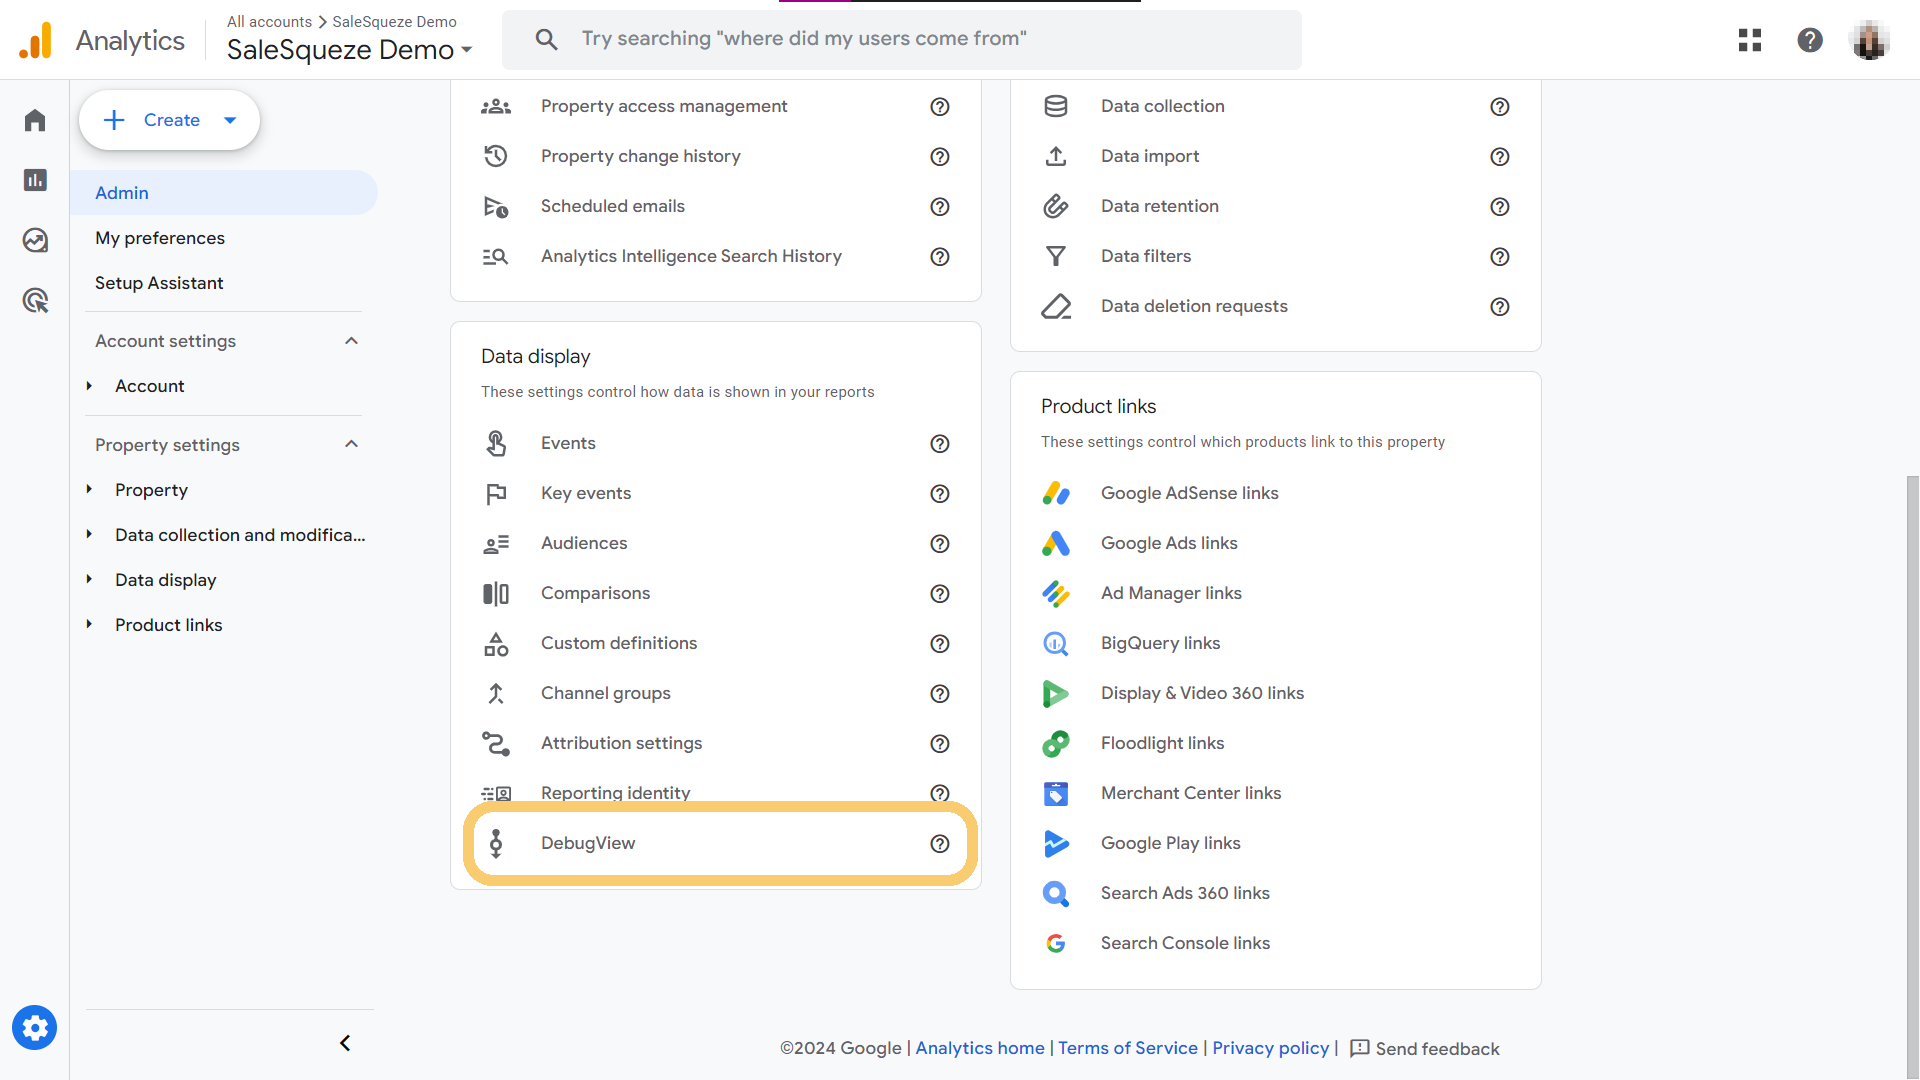
In Google Analytics, go to Admin and then find DebugView in the Data Display column. You may need to scroll down the page a little to find it.
Now switch to the tab where you have your Showroom open with the Tag Assistant connection running. Before starting the test, make sure the connection is still active.
When you’re ready, just click through your Showroom pages and complete all the flows and user actions you set up event tracking for. In our example, we’re testing the purchase event, so we went and completed a configurator flow, finishing by submitting a test inquiry.
Go back to the DebugView tab. You may need to wait or refresh it for the data to display correctly.
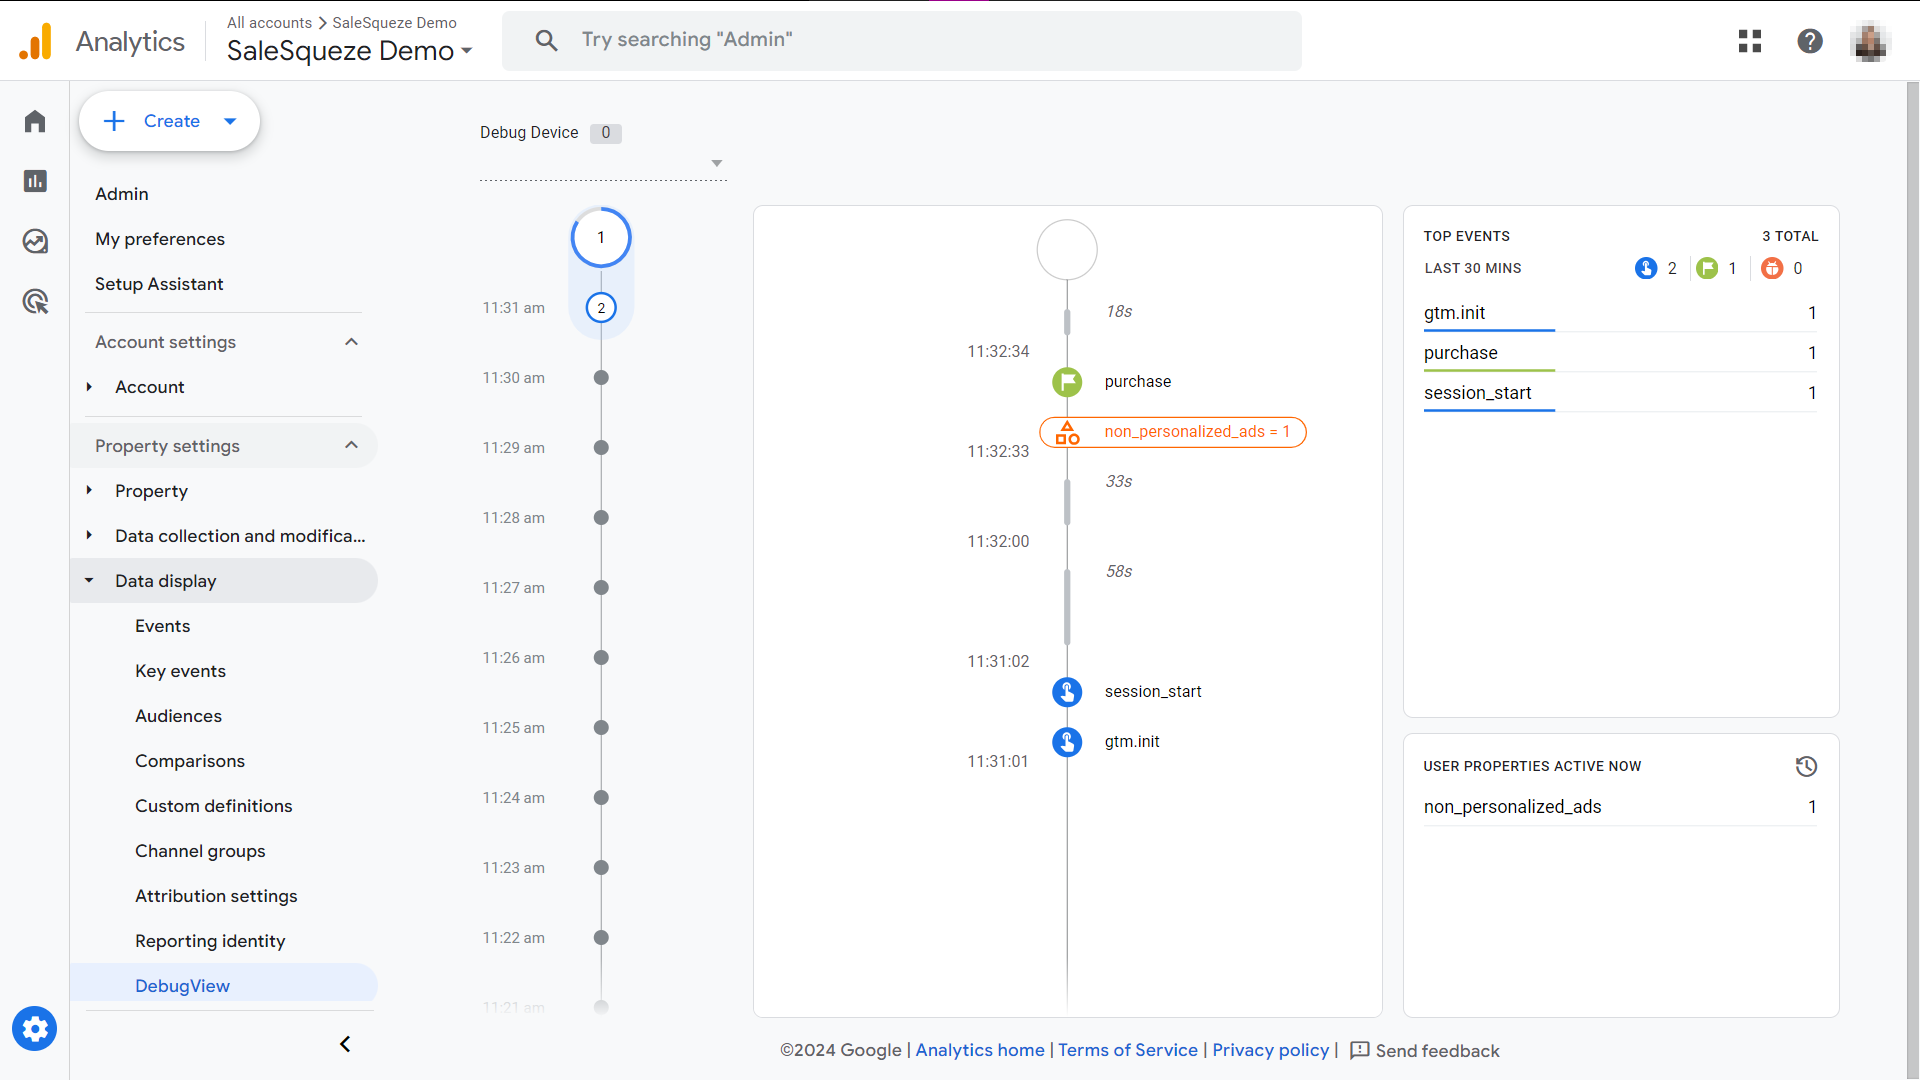
It looks like Google Analytics correctly recorded the purchase event.
Note that real data usually appears in Google Analytics with a delay of up to 24 hours.
Finish setting up Google Analytics
Mark Required Events
Navigate to Admin → Data display → Events and ensure the following events are listed and marked as key events:
- view_item
- view_step
- begin_checkout
- purchase
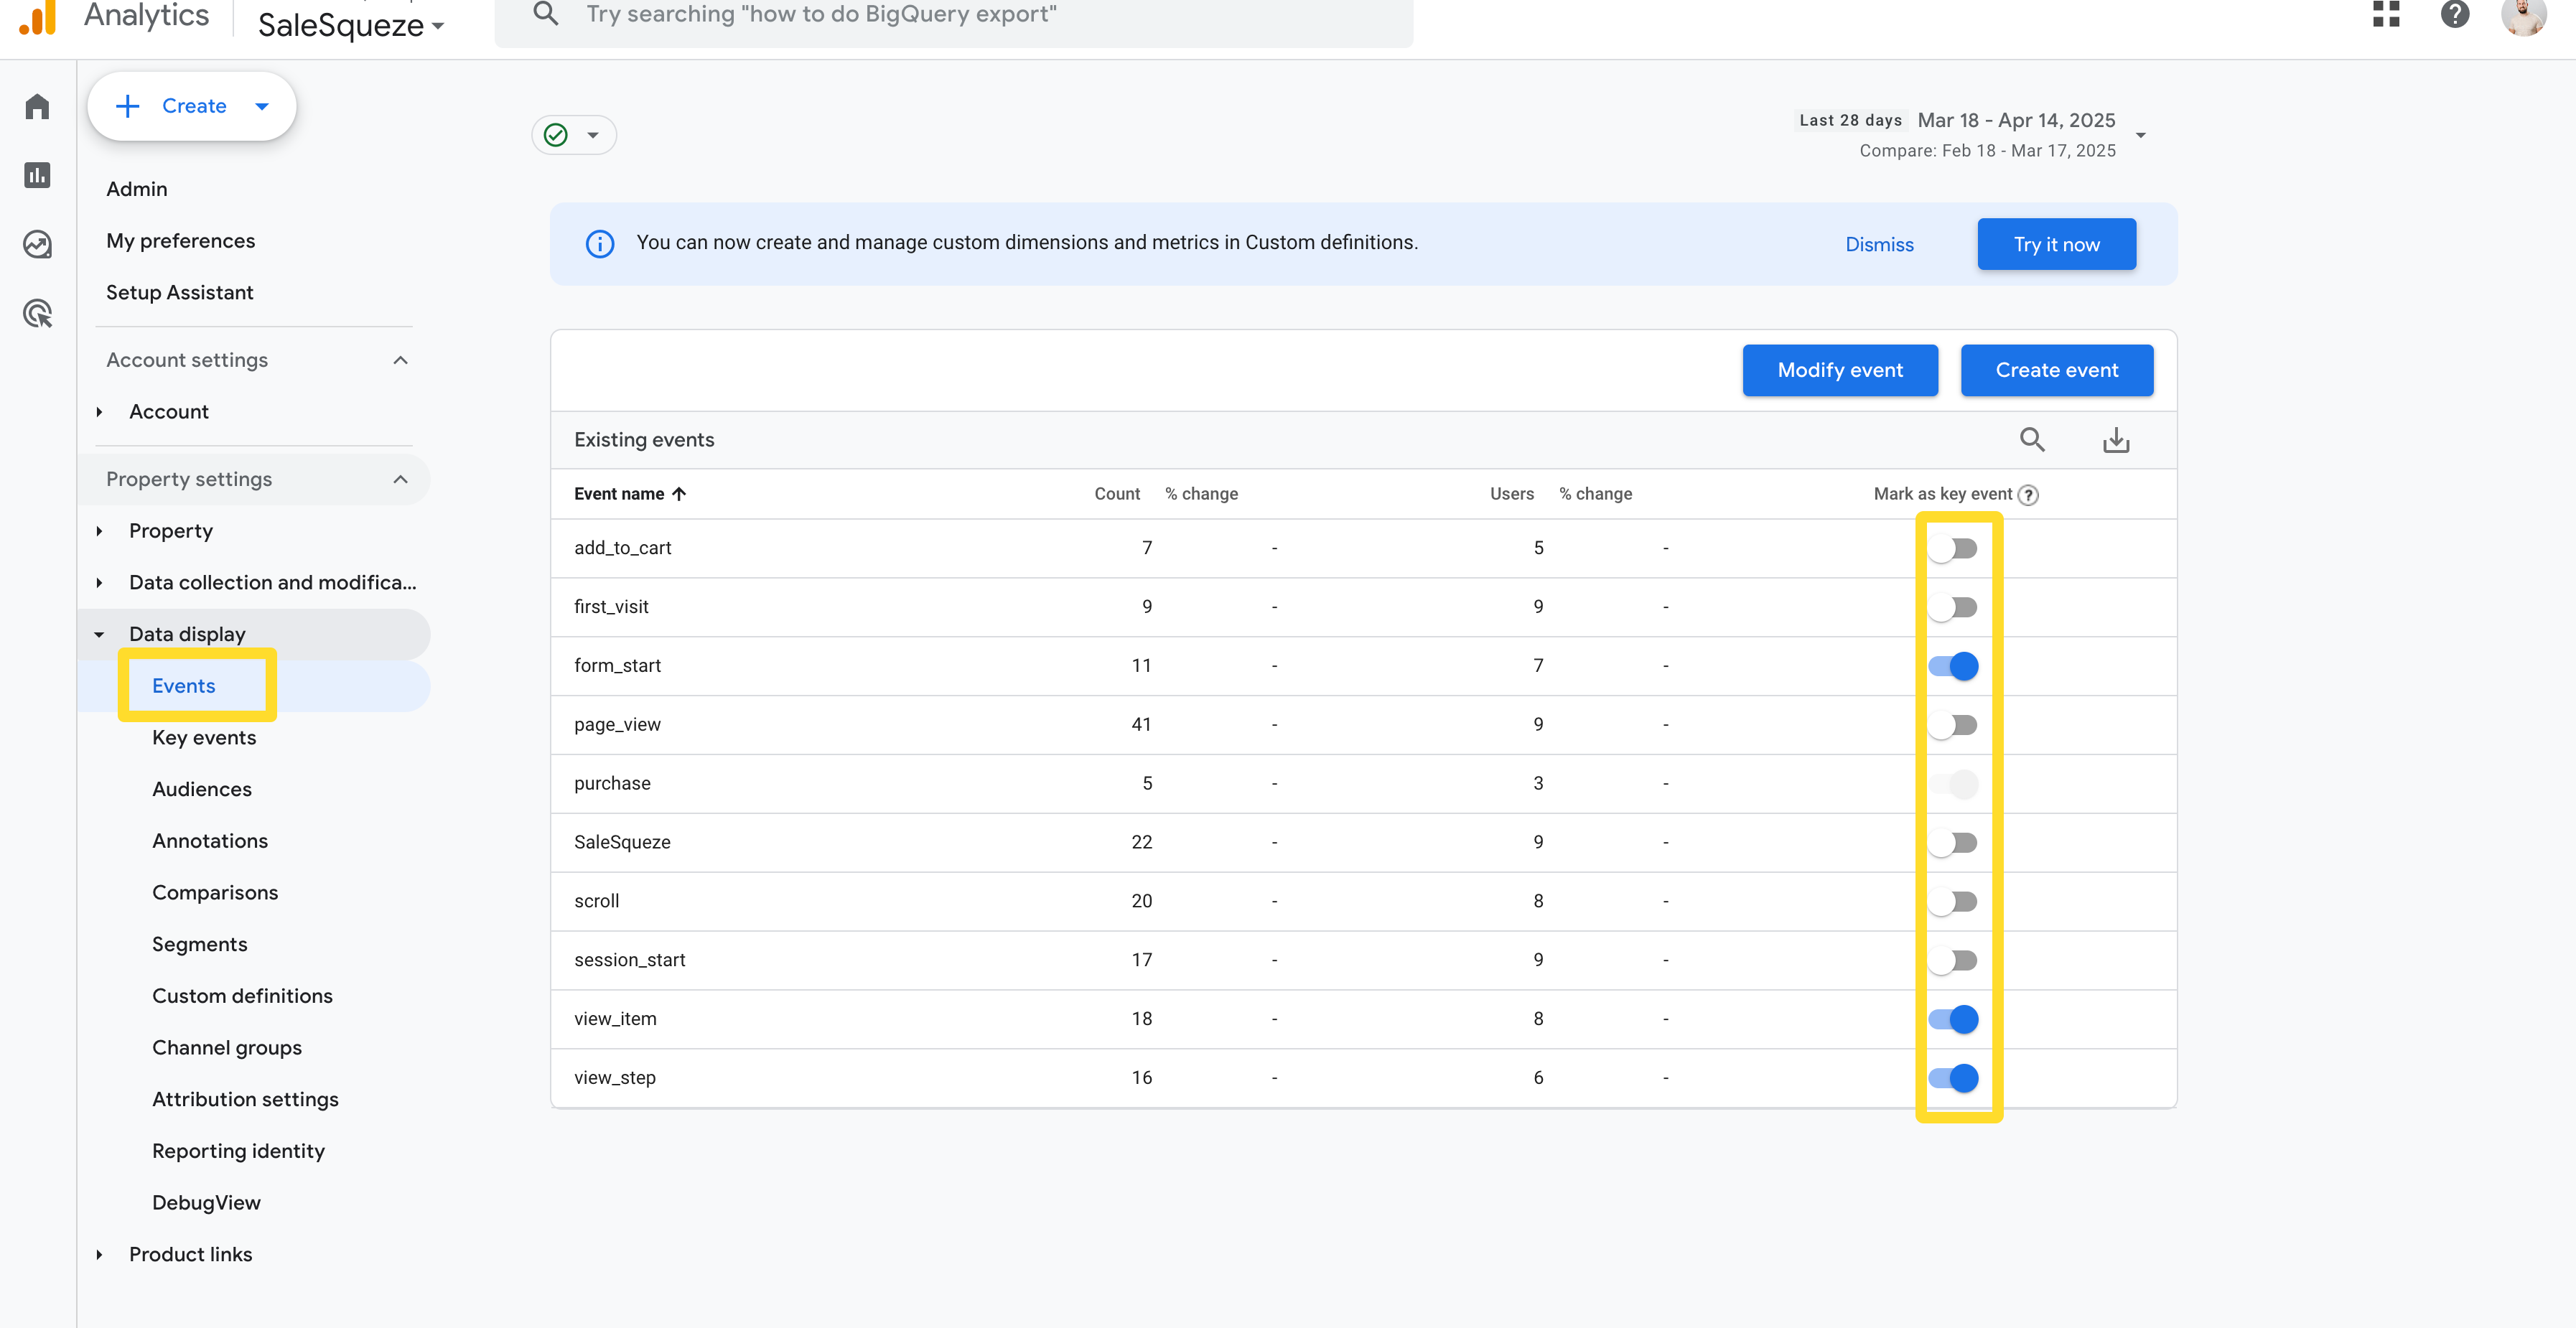
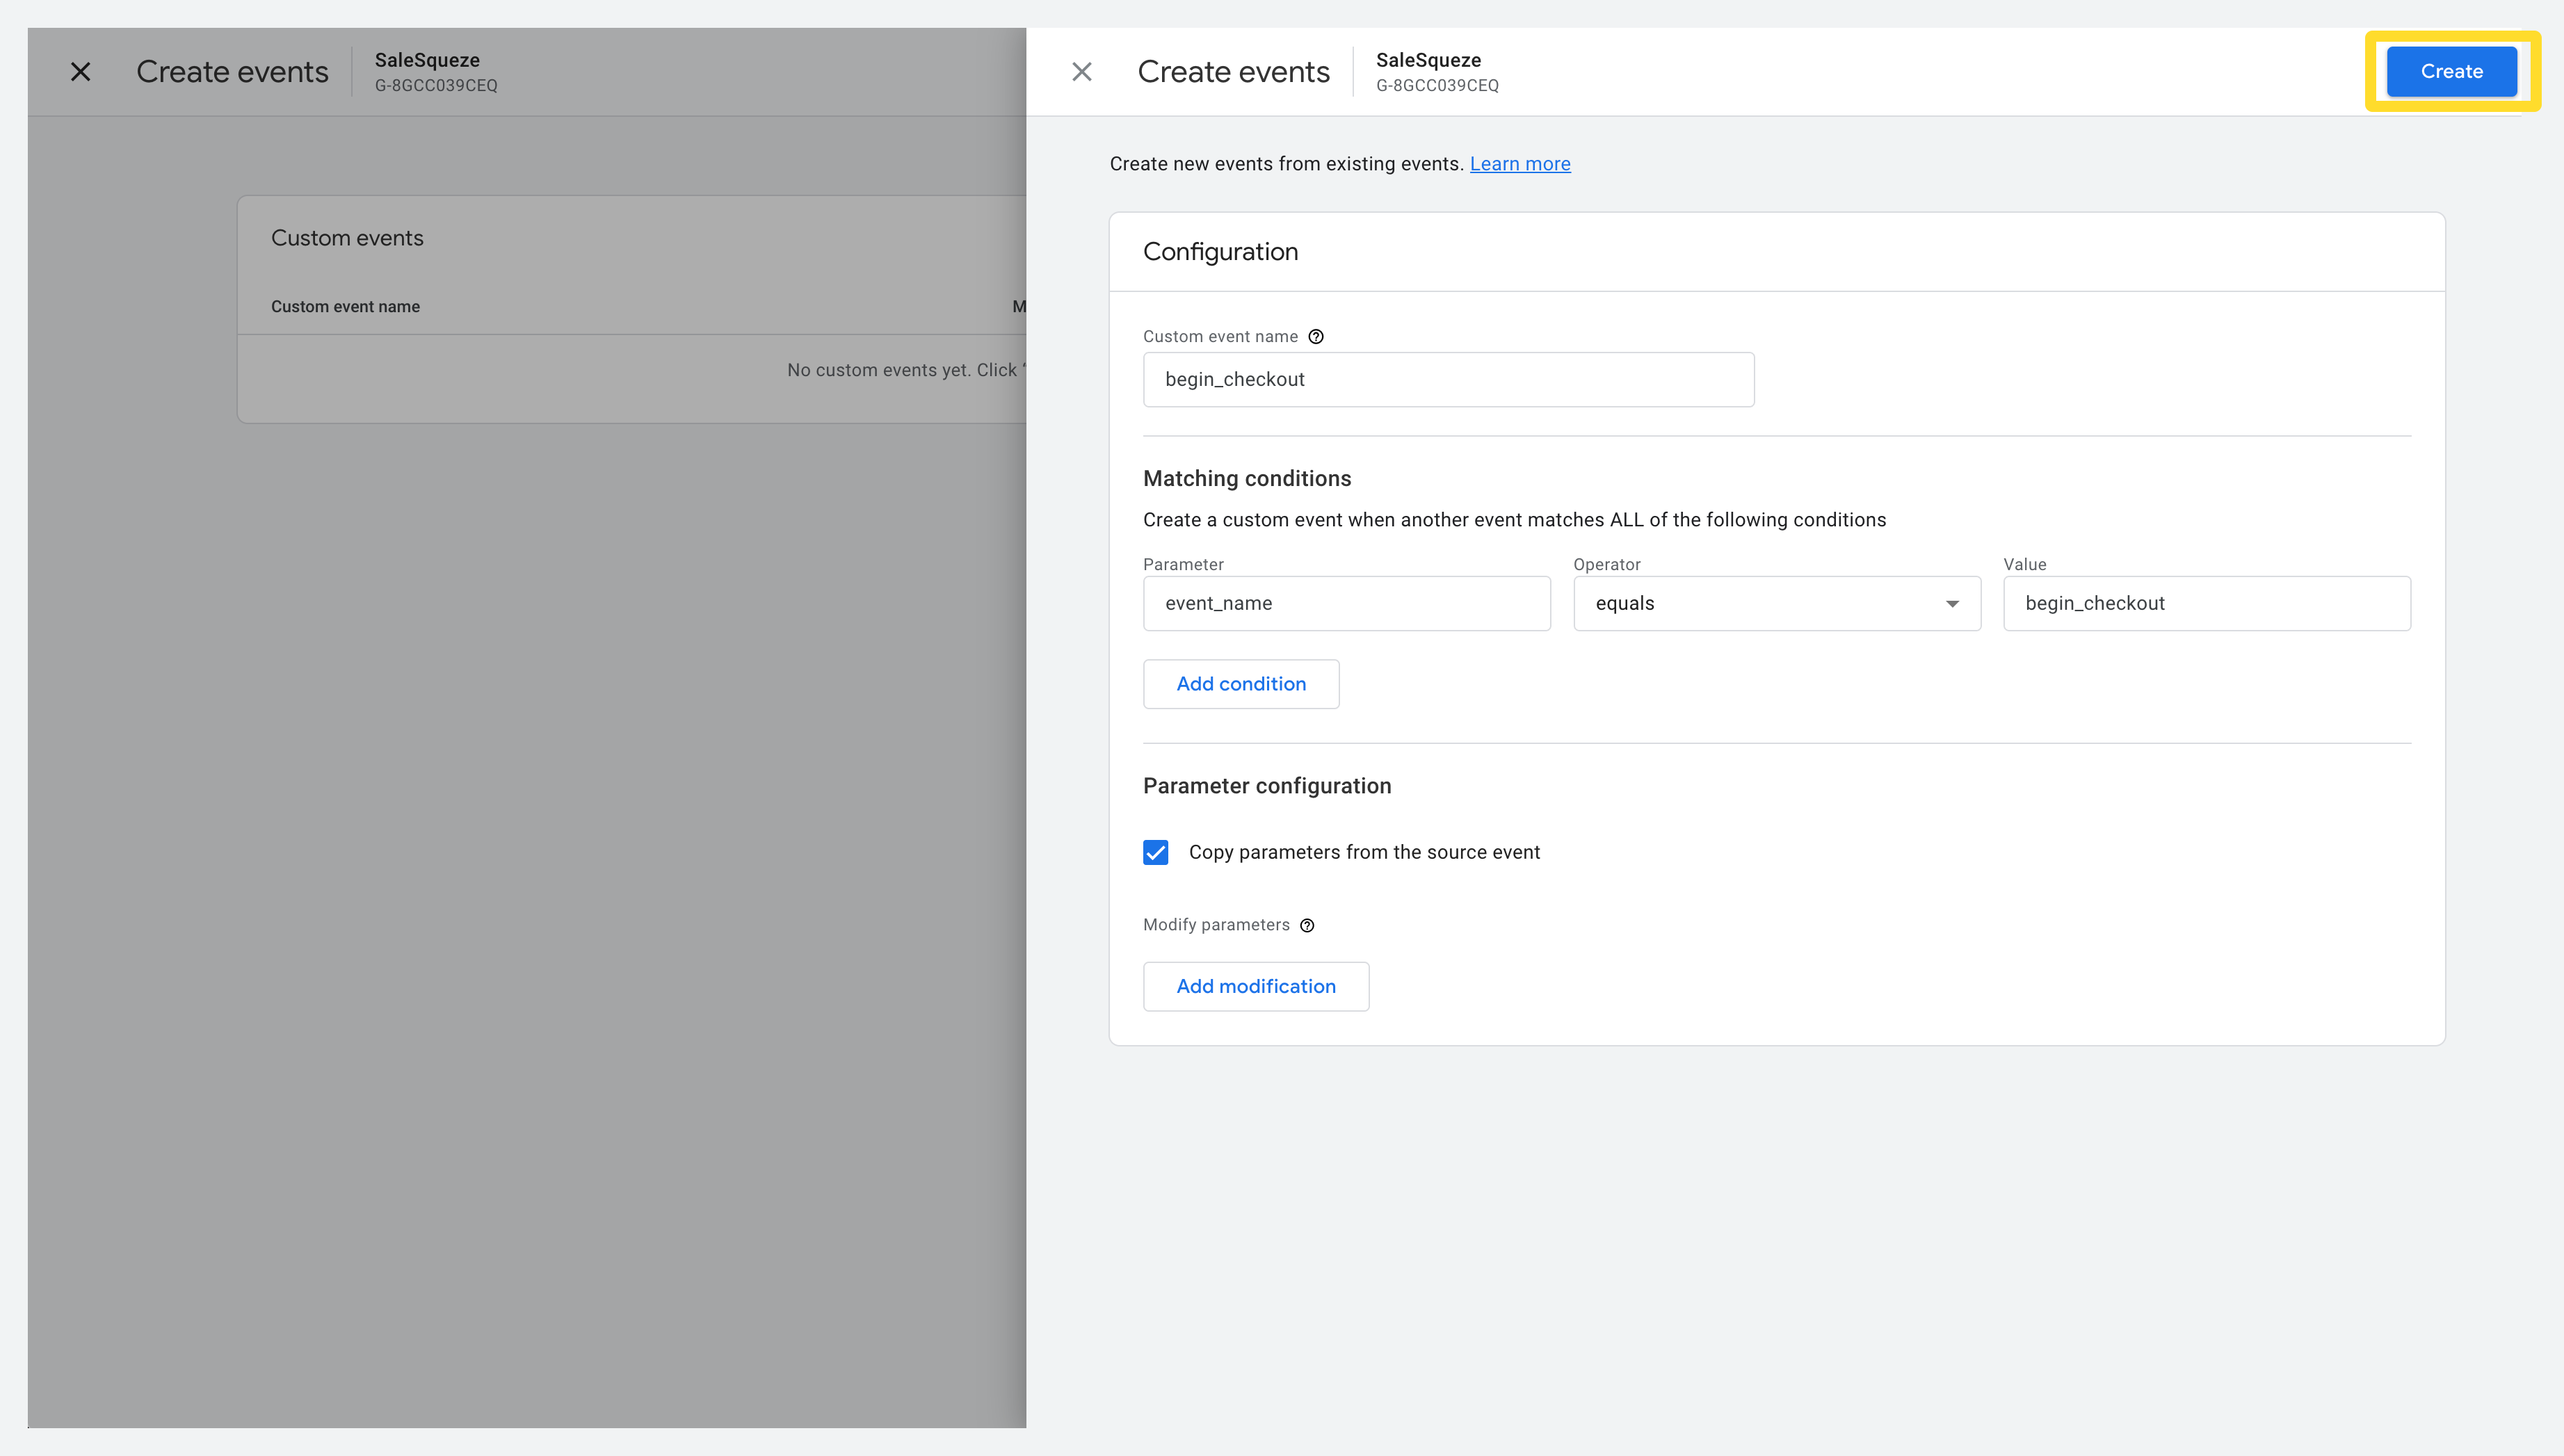
If any of these events are missing, click Create Event and manually add them.
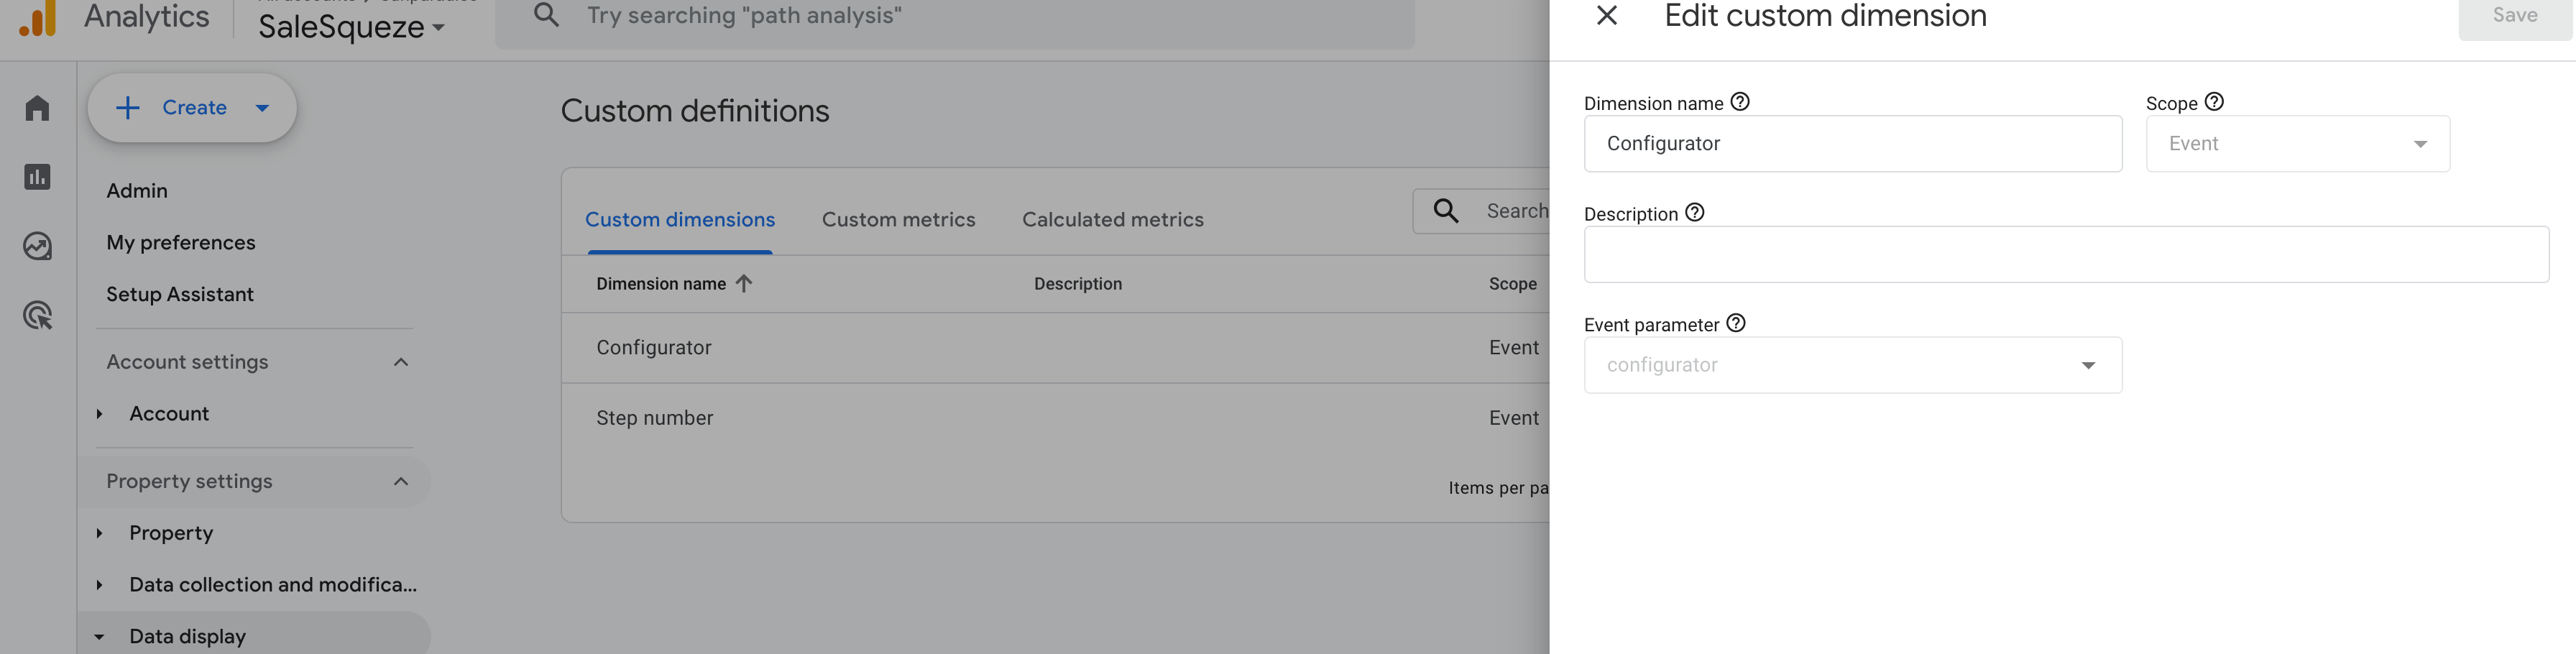
Add Custom Dimensions
We also need to add Custom dimensions, so navigate to Admin → Data display → Custom definitions → Custom dimensions
Then, create the following custom dimensions:
|
Name |
Scope |
Event Parameter |
|---|---|---|
|
Configurator |
Event |
|
|
Step number |
Event |
|
🎉 That’s It!
Your SaleSqueze integration with Google Analytics via Google Tag Manager is now fully set up and ready to track key conversion events. Great job! 🚀
Troubleshooting
Which Measurement ID should I input in SaleSqueze?
Google Analytics and Google Tag Manager use similar ID’s, so a common mistake is to use the ID from Google Analytics instead of Google Tag Manager. Make sure you’re using the Google Tag Manager measurement ID, which uses the ‘GTM-XXXXXX’ format.
You can find the GTM measurement ID either in the Admin section (labeled ‘Container ID’) or in the toolbar of the Workspace section, next to the Preview button.
The Tag Assistant can’t find my GTM tag on my website.
First, make sure you clicked the Save button after inputting your Tag manager key into SaleSqueze.
If that didn’t work, disable any adblockers you may be using. These are known to interfere with the Tag Assistant, because they generally block the gtag.js script. Disable any adblocking browser extensions in the Extensions menu, and if your browser has an integrated adblocking feature, make sure you turn that off as well.