Setting up a connection with webhooks
Webhooks are lightweight, event-driven communications that send data between applications. They are automated, and triggered by specific events, which makes them an important building block in web app automation.
You can use webhooks to connect SaleSqueze to a range of third-party tools, including CRMs like HubSpot or Pipedrive, email marketing tools like MailChimp or Mailerlite, or even a simple Google Sheet.
Webhook basics
To set up a connection to any application that supports webhooks, you’ll need to generate a webhook endpoint (URL) in whichever external service you’re using. When you configure your webhook in SaleSqueze, you need to supply this endpoint URL and specify which events you want to communicate.
You can currently register one or more of these event types:
- Create Inquiry
- Reject Inquiry
- Create Quote
- Prepare Quote
- Confirm Quote
- Decline Quote
- Quote Expired
The webhook URL will receive a webhook request each time one of the registered events is triggered. For example, when someone creates an inquiry in your Showroom, a webhook request will be made.
Once your webhook is configured, you’ll also need to configure the settings for the receiving application. For example, you might want to filter the webhook payload, so you only capture the data you need for the purposes of each specific connection.
Most applications don’t listen for webhook requests automatically, so you’ll need to use an intermediary solution like Zapier, n8n, Make, Hookdeck, or another similar service.
Example: Using Zapier to connect SaleSqueze to Google Sheets
In this example, we will build a mailing list that includes email addresses from everybody who has submitted a quote request using your SaleSqueze configurator.
To set up a webhook connection between SaleSqueze and a Google Sheet, you’ll need:
- A Google Sheet
- A Zapier account
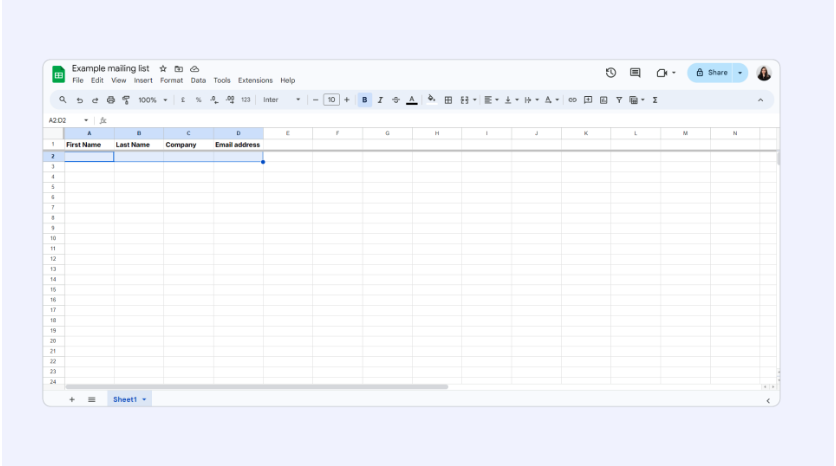
01 – Prepare your spreadsheet
First, prepare the spreadsheet and set up the columns you need. Our example sheet has four columns: First name, Last name, Company, and Email address.
02 – Create and preconfigure your Zap
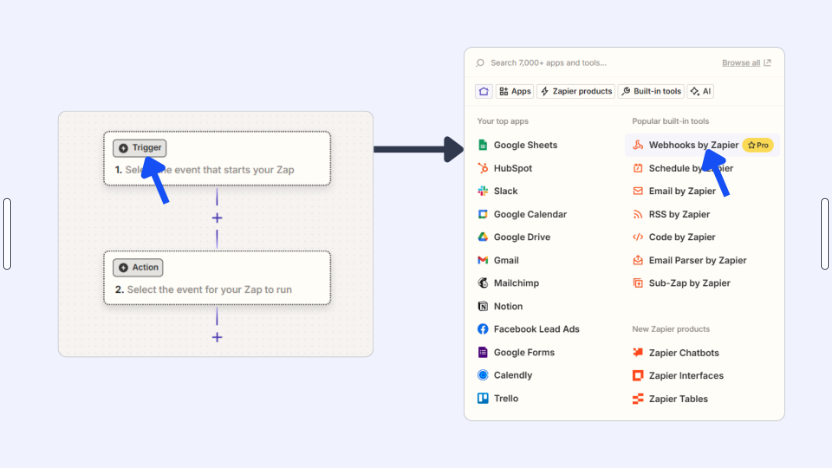
Sign in to your Zapier account. When signed in, click on the Create button and select Zaps. Click on Trigger and then select Webhooks by Zapier.
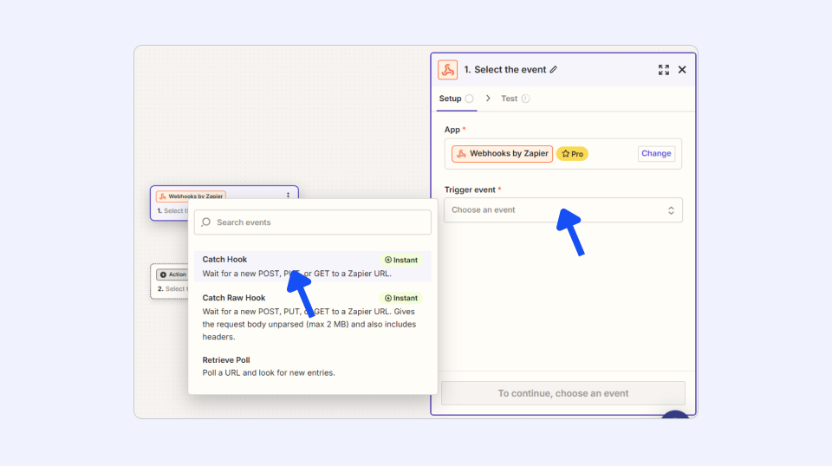
In the event setup wizard, choose Catch Hook to trigger your event, then click Continue.
In the next step, you can type in a child key that lets you filter out data from the webhook payload that you don’t need.
For our example, we’re using document.cpq.contact so we are only capturing contact data.
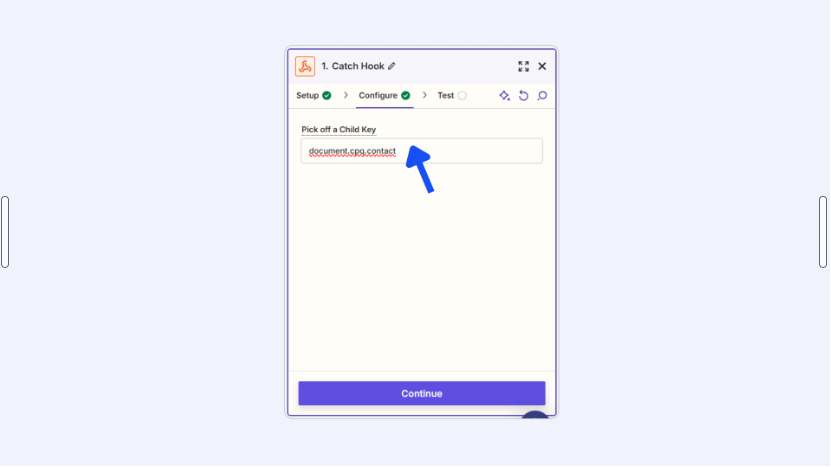
You could also keep this blank and let Zapier catch the full payload for each event. Click Continue.
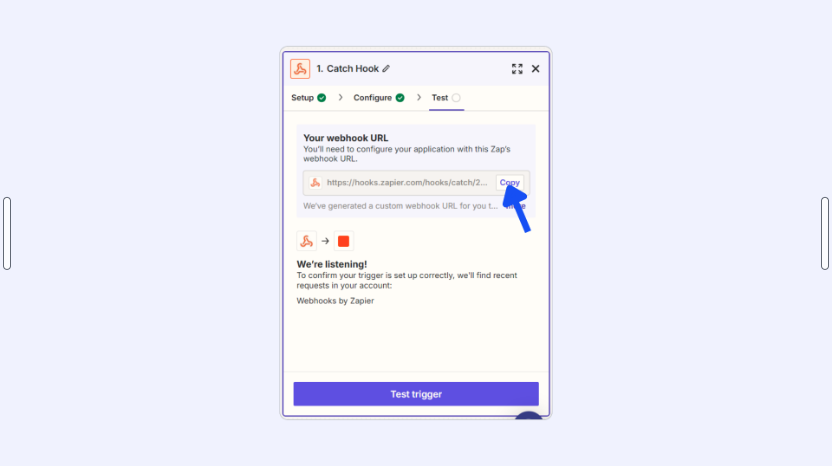
Now, copy the webhook URL generated by Zapier to your clipboard, then switch back to SaleSqueze.
03 – Create a webhook in SaleSqueze
In SaleSqueze, click on Settings in the bottom left of the menu panel, then open Apps.
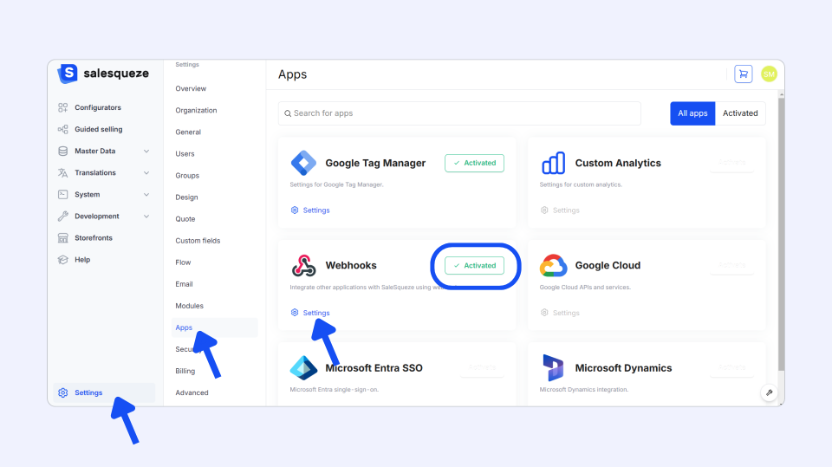
If you haven’t done so already already, activate the Webhooks app by clicking on the Activate button. Then, click on ⚙️Settings to open the webhook settings.
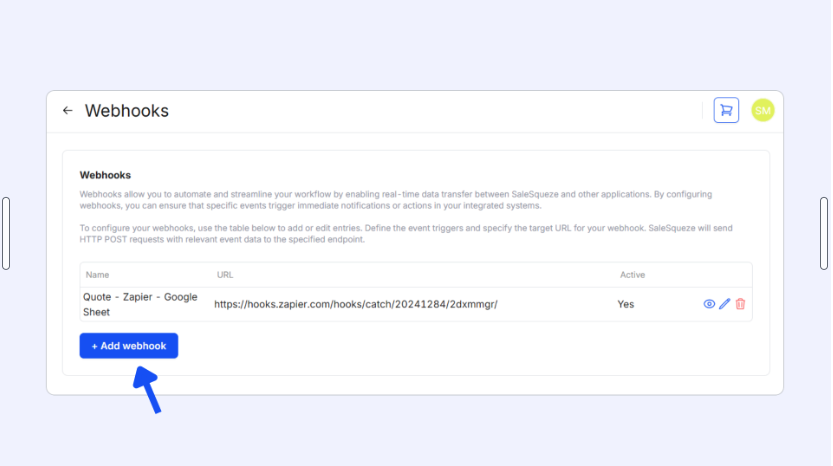
Here, you’ll be able to see a list of all your webhooks. Click on+ Add webhook to create a webhook.

Give your webhook a descriptive name, so you’ll know what it does at first glance.
Paste the URL from Zapier here, and then select your triggers.
In this case, we want the webhook to trigger every time a quote is created, so tick off Create Quote. If your CPQ is configured to create inquiries when a customer submits a configured product, select the Create Inquiry option instead.
To save the webhook, click OK.
04 – Test the webhook
Test the webhook configuration by performing the trigger action – for this example, this means you need to create a quote/inquiry.
Visit your Showroom page as if you were a customer and submit a quote request/inquiry.
Then, go back to Zapier and click Test trigger.
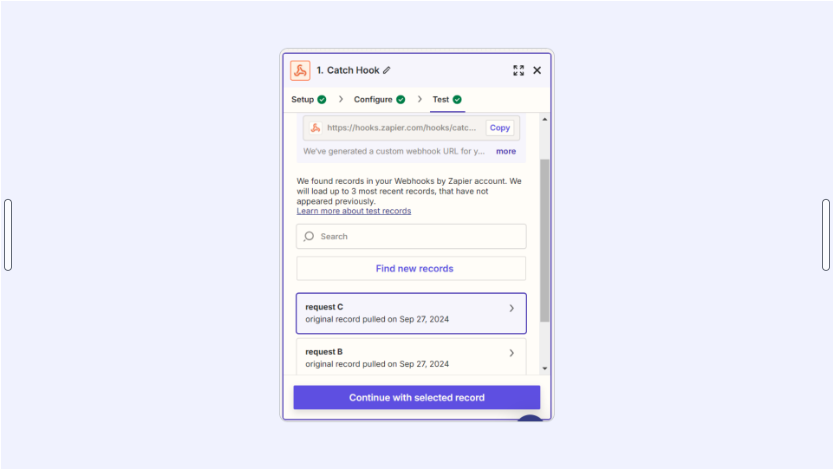
If you’ve configured your webhook correctly, the test should return a record containing data from your test submission.
If the test doesn’t return a record, go back and check whether you followed each of the previous steps.
Click on Continue with selected record.
05 – Map data to Google Sheets
Choose from the list of available apps for the Action. This is the destination application, where you’re sending your event data to. Select Google Sheets.
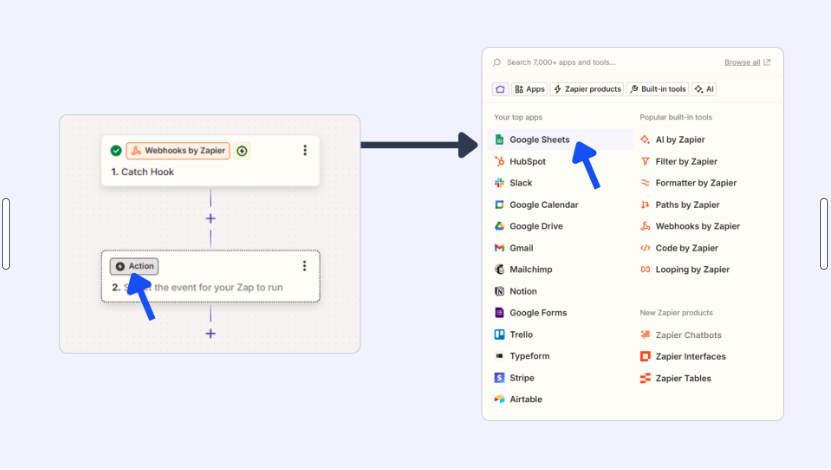
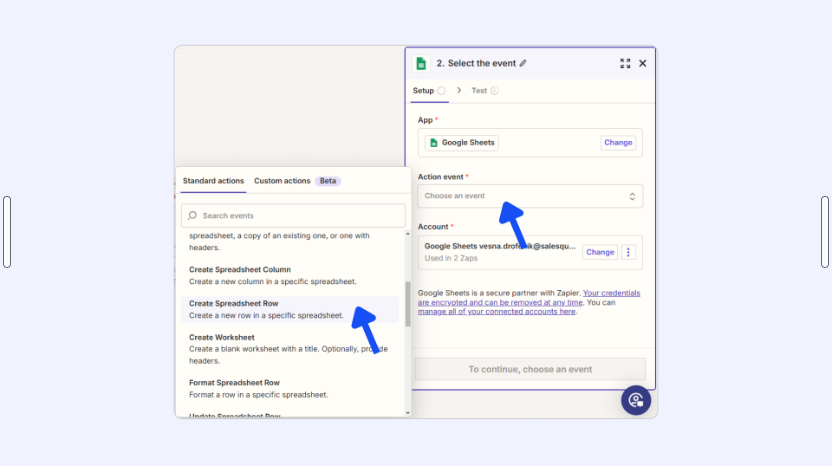
Now, select an Action event. For this example, you want each triggered event to add a new entry to a list, so select Create Spreadsheet Row.
Under Account, you’ll specify the Google account you want to use to access the Google Sheet file.
At this point, Zapier will ask for permission to access your Google Drive if you haven’t granted it previously. You need to confirm permissions so that it can access and edit your files for you automatically.
If you’ve granted permission before, just review the selected account to make sure it’s connecting to the correct one.
To move on, click Continue.
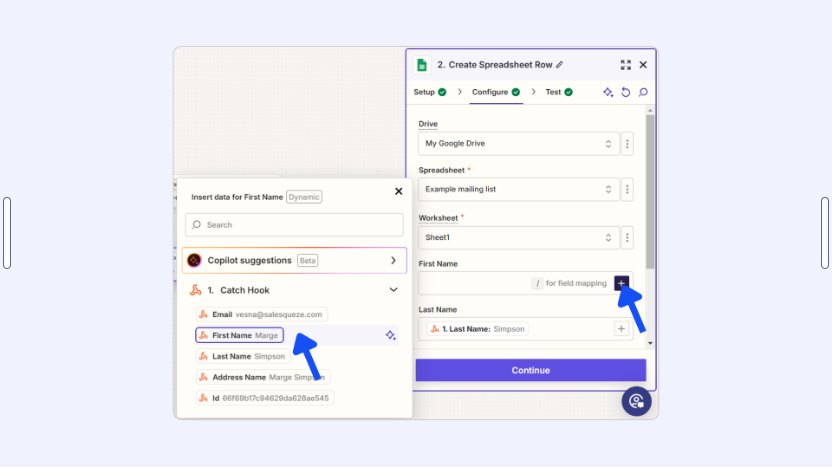
Next, configure the destination details: Select your Drive, Spreadsheet, and Worksheet.
Then, map each column in the worksheet to the event data. Zapier will automatically detect your spreadsheet headers, so you shouldn’t have any trouble with this if you named your columns.
Click on the Plus button for each column and select data. Since we used a child key for this example, we only see a small portion of the payload.
You’re almost done! Click Continue.
06 – Review results
Click Test to see the data output. This is what Zapier is going to record to Google Sheets. Check the spreadsheet to see if the data has been sent correctly.
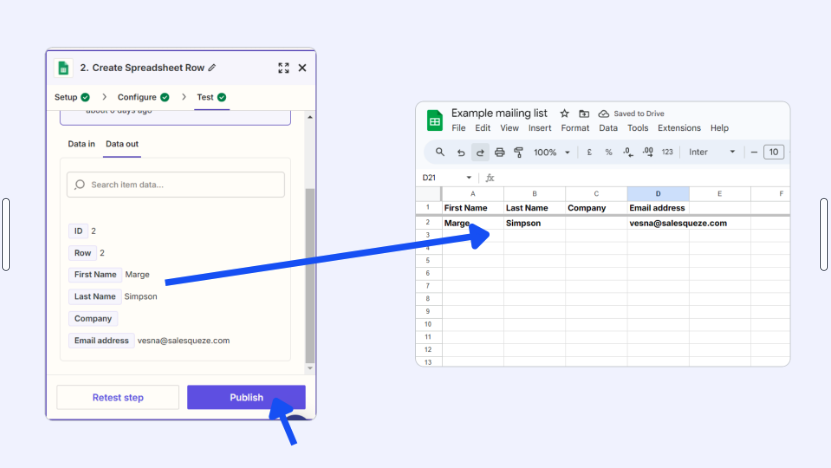
When you’re done with testing, only one step remains. Switch back to Zapier again and click Publish to activate the connection.